If you ever watch the Food Network Star you will know that they tell the contestants they need to have a story or some other personal connection with the dishes they make and present to camera. So today I have a little story that goes with pesto and one of my favorite sandwiches.
There was a little French bistro-cafe in the Bay Area I used to go to when I was shopping in the area. The cafe was quaint and had a simple French decor, but the food was fantastic. My favorite dish was a pesto chicken sandwich. The sandwich consisted of a french roll with pesto chicken, a roasted red bell pepper and a tomato. You could easily add a piece of butter lettuce or arugula. Something with the combination of pesto and roasted red bell peppers works. Since the cafe is no longer in business I have decided to recreate my own version, plus I love making pesto with fresh basil from my herb garden. Oh and you can freeze pesto too, which is great. I often make a large batch of pesto at the end of the season before my basil plants die and freeze it for later. Makes a great sauce on pasta or added to other dishes.
Pesto Recipe:
about 2 cups fresh basil leaves (no stems/stalks)
2-4 garlic cloves
1/4 cup pine nuts (toasted or un-toasted)
about 2/3 cup olive oil
salt and pepper
a pinch of nutmeg
about 1/4 cup of Parmesan, shredded
Optional: 1/4-1/2 cup fresh parsley leaves
Chicken: (this was a great tip from my Aunt!)
2-4 skinless, boneless chicken breasts
1 tbsp poultry seasoning
salt and pepper
1-2 tsp garlic powder or granulated garlic
water
Sandwich Ingredients:
1-2 roasted red bell peppers (or jarred roasted red bell peppers)
Bread of choice (dark wheat, french bread, ciabatta or sourdough)
tomato
butter lettuce or
arugula
mayonnaise
Instructions:
1. Combine all ingredients, except olive oil in a food processor. Process until all are finely chopped. While food processor is running drizzle olive oil in. Combine until desired consistency. Set aside.
2. In a Crock-pot or slow cooker place chicken breasts and seasoning. Add enough water to cover and let cook several hours at low setting. Once chicken is cooked through, shred it and drain water. Set aside to cool.
3. Combine about 1/3 cup of mayonnaise with 1/2-2/3 cup pesto. You may alter the measurements if you want more or less pesto to mayonnaise. Taste and adjust accordingly.
4. Add a portion (about a cup, more or less if desired of cooled chicken to mayonnaise/pesto mixture and combine.
5. Assemble sandwich. You may toast bread if desired. Add desired amount of chicken to one slice or bread. Top with roasted red bell pepper, tomato and lettuce (if desired). Add the other slice of bread and your sandwich is ready!
 |
| pesto |
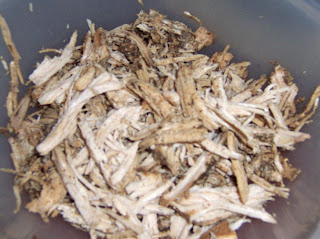 |
| shredded chicken |
 |
| pesto mixture and chicken |
 |
| open-faced sandwich version |